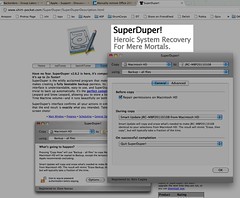
 My hard-working Macbook Pro, which I keep running pretty much 24x7 without a break, had a hard disk failure yesterday. The dead disk was inconsolable, and no amount of Disk Utility or fsck or Applejack would cure its ills. I tried the usual boot-from-install-dvd-and-run-disk-utility, but that did not work either, and the fact that I do a daily Cocktail run to keep things clean wasn't relevant - a dead disk is a dead disk. Then I remembered I had been taking a nightly scheduled backup with Shirt Pocket's super-duper utility "SuperDuper!", and so a little manual reading later, I was able to get back up and running in a jiffy.
Here's How I Restored a SuperDuper! Backup to a New Hard Disk
First I went and got a 500GB Seagate Momentus XT hybrid hard disk / SSD drive. Pretty nifty technology. It was trivial in my 1st generation MacBook Pro unibody to remove the old disk and put the new one in. You just remove the battery, and there is a single plus screw holding in the bracket that holds the drive in. However, you do need a Torx driver to remove four small posts from the drive itself, so you can transfer then to the new drive. A Torx T6 size is what fits the model I have.
Once the drive was installed, next, I booted from my Snow Leopard DVD, and after a while I saw the familiar install screen prompting for a language choice. You will notice that a menu will appear at the top of the screen, and that you can then choose to open Disk Utility from that.
In Disk Utility booted from the DVD, I then got busy partitioning the new drive (just chose to make one big 500GB partition called "Macintosh HD" as usual), and then went to the Restore tab. It is not a problem to restore a sparseimage made from a 300GB drive, to a new 500GB drive, so I just connected the FireWire drive containing the SuperDuper! sparseimage file, and did a File, Open in Disk Utility to mount that image. I chose the backup from within the sparseimage, and told Restore to restore to Macintosh HD. About 2.5 hours later, the restore completed without incident.
I then used Disk Utility, still in setup mode, to verify the drive and repair permissions. No problems detected.
Post-Restore Tasks
There were a couple of things to do after the restore.
- SuperDuper! restores the drive just fine, but renamed it to the name of the sparseimage. I had to do a cmd-i on the drive in Finder, and rename it back to Macintosh HD.
- Since SuperDuper! excludes the sparseimage from indexing, your restored drive will also be excluded. Just go into Spotlight preferences, and remove the Macintosh HD from the Privacy exclusion list.
So, in conclusion, that nightly backup via SuperDuper! to an external FireWire drive really saved my bacon! Kudos and thanks, Shirt Pocket!
No comments:
Post a Comment