Showing posts with label cycling. Show all posts

Sunday, September 05, 2010

Mama-chari Schrader Valve "Mushi Gomu" Repair

Shinko "Mushi Gomu" Valve RubberIf you live in Japan or have visited, you will know the ubiquitous "mama chari" (mom bike) from its loud squeaky brakes, and precarious perching of bags and children both, on its front and rear platforms and baskets. My wife's mama-chari rear tire got a flat, and as the resident mechanic around the house, I got to fix it. I tried pumping it up, but that was not working, and noticed that to get the rear wheel off if I had to remove the tube, I would have to disassemble the rear friction brake (the source of all that squealing!).

Yikes, lots of parts. I decided to google removing the rear wheel on a mama-chari, and found an article talking about that topic, but warning readers to make sure the "mushi gomu" was intact, saying this is a common cause for what people think are flats. This mysterious "bug rubber" (虫ゴム) is just a little rubber tube about 1.5 mm diameter and 2 cm long, that you slide over the valve plug. It forms a seal between the metal valve plug and the side of the valve, letting air in during the pumping, but keeping it from flowing out otherwise. But, it makes like a flat if it is oxidized.

If you remove the valve cap, and unscrew / pull out the valve plug from the valve case sticking out of the hole in the rim, you can check whether the rubber is rotted or otherwise broken. Sure enough, when I took a look at ours, it was all rotted and falling off. So I went to my LBS (Local Bike Shop) and asked for "mushi gomu". JPY 150 and we were all fixed in 5 minutes.

Hope this helps other cycling DIYers in Japan.

Tuesday, September 01, 2009

Changing a Bike Tire Inner-tube

I got a flat the last hill of my 100 km bike trip last Sunday. Thank heavens it did not happen at km 50 or something. I went to a bike shop in Shinjuku today to get a replacement tube, and they were kind enough to tutor me on how to replace it.

How to Change that Tube

Here's the process I learned at the bike shop:

  1. Purchase a tube, tire levers (they come in sets of three, usually) and rim tape of the appropriate size. My rims are 26 inch with 1.5 Schwalbe Marathons on them now, and you just have to be sure what you buy is the right size. If you can give them the rim size, that's better too. The tubes come with various valves, and I have "French" valves now so that is what I got. All told, the cost to buy the parts was about JPY 1300 (USD 13).
  2. Remove the wheel with the flat from the bike. I have Shimano Deore XT rim brakes, and there's a place you hook the brake wire's flange in, which if released, gives you the leeway to get the tire off.
  3. Blocking BoltIf you have French valves, completely remove the bolt that keeps the valve in place in the rim.
  4. On the opposite side of the wheel from the valve, insert a tire lever between the rim and the tire, and use it to lever the tire out, in that area. Take care not to pinch the tube while you do it, just in case you want to fix and reuse it. You'll notice there's a kind of hook on the one end of the lever - this goes onto a spoke to keep the lever in place, holding the tire edge out and away from the rim.
  5. A couple of spokes away, do the same thing again with the second lever, to get more of the tire out.
  6. Now you should be able to slide the third lever under the edge of the tire, and rotate it along the rim and tire edge to get the tire out. You can keep the one edge of the tire in the rim.
  7. Slide the flatted inner tube out, taking care not to damage it if you want to repair it.
  8. The CulpritInspect the tire inside and out for damage. There could be something sharp embedded in the tire. Remove any sharp objects puncturing the tire. In my case there were two pieces of a broken spoke embedded in the tire and in the rim tape. I could only find the one embedded in the tire by running my hand along the inside. The rim tape problem was quite obvious!
  9. Old Rim Tape IndentationsIf you either remove the tire completely or just push it to one side, you should be able to see the rim tape, which prevents the inflated tube from working its way into the nipple bolts for the spokes. Rim tape prevents flats, but, in time it gets worn out too. If it has been mashed into the nipple bolts too much, and there are sharp edges, replace it. Rim tape is basically like a big rubber band with a hole for the valve. You can use a flat blade driver or an awl to work old rim tape out, and to lever new rim tape on. In my case, the yellow rim tape was two years old and starting to get dry, and, it had been punctured by the old spoke bit, so I replaced it.
  10. Put a little air into your new tube, because it is easier to work with the tube if it is slightly inflated.
  11. Insert the valve through the rim tape and rim, and put the valve bolt on to secure it.
  12. To put the tire back, this time start on the valve side (removal starts opposite the valve). You can use the tire levers to get started putting the tire back into the rim, but be careful not to pinch the new tube. Having the tube slightly inflated will make things a little easier to maneuver. Once you get the tire in a little, use your hands to kind of "knead" the tire back in, working around it. Schwalbe Marathons are a little tough, as they have Kevlar inside and are consequently a bit harder rubber.
  13. Check that the valve is 90 degrees to the rim. If it is angled, work the tire and rim until you can rotate it so it is perpendicular to the rim.
  14. Inflate the tube to the correct psi pressure. Confirm that it's holding air and that you have not damaged the tube.
  15. Deflate the tube once, then re-inflate. The bike shop said this last step really helps to prevent flats.
  16. Go ride!

Hope this procedure helps someone with their tube troubles. Happy riding!

Presta "French" ValveBlocking BoltOld Rim Tape IndentationsAlign the Rim Tape Hole18mm Bike RibbonThe Culprit

Sunday, May 24, 2009

New YPK Innovations Lock

New YPK Innovations Lock - Cafe 2.0I got a new bike lock from YPK Innovations - a Cafe 2.0. The model I bought has a more flexible and just slightly lighter cable than the last, as well as much harder, more durable-seeming plastic around the lock. I like it better.

There were two problems with the old one, that cropped up after 18 months of daily, outdoor use at the train station:

  • The plastic bezel around the lock broke, exposing the metal lock.
  • The metal collar inside, around the lock itself started to rotate, covering up the hole that the post was supposed to be inserted into.

Here are photos of the problem:

Broken YPK Innovations Lock - Steel Collar RotatedBroken YPK Innovations Lock - Plastic Shell Cracked

I think the one I just bought is a generation old, but it still seems better than the first one. These YPK "cafe" locks are nice because you can make two loops for flexible locking.

Thursday, April 16, 2009

Updated Mac and Cycling FAQs

I updated my Mac and Cycling FAQs. They are not comprehensive, but are a compilation of answers to questions that I wanted answers for when I started using a Mac and separately when I began cycling. Enjoy!

Sunday, October 19, 2008

No Bikes Allowed on the Bridge to Hakkeijima

Papa and Ju at Sea Paradise - 17

I tried the hilly, hilly East route again this weekend, and made it all the way to Hakkeijima Sea Paradise, which is an awesome place to take the family. The trip was about 45 km, and I dragged the Nikon D90 in my quite-rugged Speed Freak waist pack from Think Tank Photo, and took a few shots of the bridges in that area with a wide angle lens.

When I tried to cross the main bridge to Hakkeijima Sea Paradise, thinking I'd get some lunch there, I was greeted with a blasted announcement aimed right at me. "No Bicycles Allowed in Hakkeijima Sea Paradise. Please use the bicycle parking lot behind you on the left." Actually it was more like "NO BICYCLES ALLOWED!" And of course it was in Japanese. I was so surprised by the volume I nearly fell off! (It was definitely cranked to 11) So much for lunch at Hakkeijima. I got a lot of evil stares (like Ultraman), and then some laughs because I understood the warning fully, and that it was aimed at this helmet-wearing, waist-pack toting white-boy gaijin, but at least I did not get fined 98.00 bucks for my 6 feet.

Sunday, October 12, 2008

New Hilly Japan Bike Route from Gumisawa to Hakkeijima

Cycle Fitness 2008

Saturday 11 Oct I rode a new 40 km route, this time going East from the mother ship towards Hakkeijima. I went up kanjo 3 go, towards my elder daughter's school, and over to CostCo for some bagels and granola, but it was much harder than I thought, with a 4 km hill right out of the gate. A good difference from the usual "almost no hills" route. Hill-riding is really a different skillset, and is tiring in a different way from my 63 km route down to Enoshima, along the coast, and up via the Sagami and Mekujiri rivers.

Check out my other bike routes in Japan, as there are some really nice places to ride here in Kanagawa and Shonan.

Saturday, September 06, 2008

Schwalbe Marathon Trip Report

Today I did this route, which has about 10 km of gravel and trail, 13 km of sandy asphalt, and the remaining 40 km regular paved roads or bike roads. I was very pleased with the Schwalbe Marathons I got last week. They have a good feeling, roll very well, and seem to be tough enough to go over patches of asphalt with glass shards without incident. Kudos to Schwalbe for making such a tough tire!

Tuesday, September 02, 2008

New Schwalbe Marathon Tires

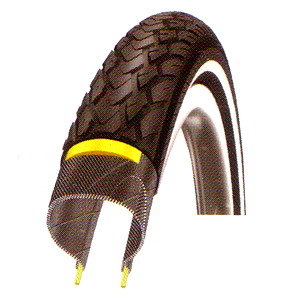
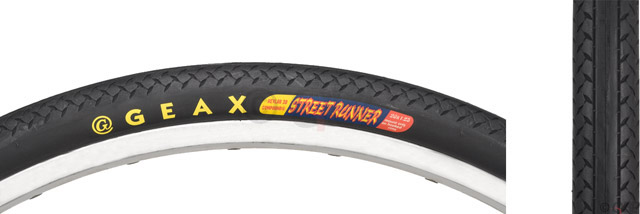
My original Geax StreetRunner slick tires were getting cracked after about 1500 km of use, so I took the opportunity to put Schwalbe Marathon tires on the bike. Very good tires that are still fast despite being "treadier" than the Geaxes. I bet they will last longer, too, if reputation is any indication. Schwalbe Marathons have kevlar inside, and have a protective strip and their Marathon Plus line is even heavier duty. I like the Marathons so far; they feel quite grippy in the corners. http://farm4.static.flickr.com/3047/2819135659_b7666c4912_o.jpg http://farm4.static.flickr.com/3153/2819980446_be404997b2_o.jpg http://farm4.static.flickr.com/3137/2819980560_45925e77e6_o.jpg

Monday, September 01, 2008

First 70 km Bike Trip

I did the River-Sea-River route Saturday in the rain, my first bike trip to exceed 70 km with a brisk personal best time of 34 minutes from Totsuka to Enoshima. The actual route is less than 70 km, but thanks to getting a bit lost around the Atsugi base, the whole trip was 70.5 km. Not bad for starting last November, but I'm still in no semblance of good shape. Another first was that I took the bike apart to clean it using an organic "orange" de-greaser, and changed the pulley wheels from the Shimano Deore XT plastic ones (seems like a hard vinyl-like substance) to aluminum ones. The metal ones are a bit noisier but it was an interesting exercise to swap them out and see how the thing fits together.

Thursday, August 28, 2008

My Bicycle Routes - Mostly in Japan

I decided to create some Google "My Maps" to show the bike routes I take near my house in Yokohama, Japan. There are some really nice routes along the Sakai and Mekujiri Rivers. See them here: Rick Cogley's Bicycle Routes - Mostly in Japan.

Tuesday, August 26, 2008

Exporting Google's "My Maps" as KML

I have been spending some time making Google Maps in "My Maps", such as this bike route down the Sakai river, then along the Shonan coast, and back home.

Some applications, like Google Earth, use KML data to represent map routes. There is an easy link now, in My Maps, to click and open the map directly in Google Earth. But if you need the KML data for importing elsewhere, you can save it this way:

First, in one of your maps in Google My Maps, copy the URL for "View In Google Earth" by right clicking the link and copying the URL. On a mac, it's "copy link location".

Then in a blank browser window, enter the URL in the address bar:
http://maps.google.com/maps/ms?ie=UTF8&hl=en&msa=0&output=nl&msid=103784915361440638280.00045507229fde71c84ca

Now change the output by switching output=nl to output=kml. Entering the URL will give an option to save. Save the KML file somewhere on your drive, and then you can import it elsewhere.

Sunday, August 17, 2008

Japan Cycling Route - Totsuka, Mekujiri, Sagami, Ebina and back

This last weekend I researched and tried a new cycling route, which turned out to be about 59 km. The route goes through Totsuka, Shonandai, Up the Mekujiri River on a bike path ("jitenshado" 自転車度), across Zama to the Sagami River, Down the Sagami on some trails, and back across to the Mekujiri River bike path via Ebina. I entered the route on Google Maps so other English-speaking cyclists in Japan can enjoy it.

Riders should note, that the Mekujiri RIver Bike Path has sections where every 100 meters there is a "gate" you have to swerve through ostentatiously to keep speeds down. If you want to just ride straight and fast, the Yamato Fujisawa Jitenshado is better. Also, the Sagami River bike path is not so much bike path but rather more trail, and is still underdeveloped and so would not be appropriate for a road bike. I read online that they are building a proper bike path along the Sagami River, which is due to be complete in 2011. I tried to pick routes where if the route was along a road, at least there was a decent sidewalk available to use, for riders who are still a little nervous about riding on the road directly.

Enjoy!

Wednesday, August 06, 2008

Bicycle Training Log

I bought a new Centurion bike last winter, and have been riding regularly. Decided to keep a log of my travels and hopefully chart any progress. Usually I ride down the "Fujisawa Yamato Jitenshado (cycling road)" to Enoshima, round to Kamakura and back home via Ofuna. It's a good trip for me, at about 35 km depending on which route I take.

When I look at the average times of the Tour de France riders, I am humbled. They are incredible athletes, averaging something like 38 to 40 kph on the stages. Lance Armstrong averaged something like 40-plus kph over a whole tour, which means he was probably doing 30 uphill and 60 down. Wow!